NOTE You can create an organization only if you are an agency.
To create a new organization
1. In the upper right area of the screen, click Settings.

2. On the Settings page under Tools, click the Create Organization command
-or-
In the Organizations section, click the create command.

-or-
After you search for an organization, click the Create Organization button on the Organizations page.
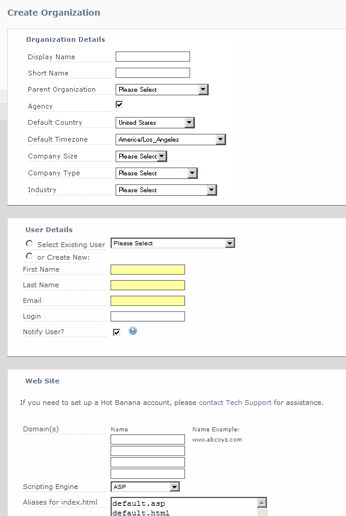
3. On the Create Organization page, type in the requested information or select it from the drop-down lists.

Display Name: Type the name of the organization.

Short Name: Shorten the organization's name to a nick-name.
NOTES

Parent Organization: Click the drop-down list and then choose the parent organization.

Agency: Select this option to allow the admin of the organization to create its own child organizations.

Default Country: Click the drop-down list and then choose the country.

Default Timezone: Click the drop-down list and then choose the time zone. In most cases, this should be the time zone where the organization is located, not a particular user.

Company Size / Company Type / Industry
Click the drop-down list for each of these and then choose the options you want.

NOTE These fields are optional. In the future, they will enable you to compare your campaign results to that of other companies with similar demographics.
User Details
IMPORTANT Each organization must have at least one admin.
To add yourself or another existing user
Choose the Select Existing User option, and then click the drop-down list and select the user name.

To add a new user
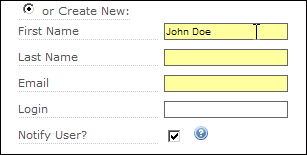
1. Select or Create New.

2. Provide the requested information:
First Name: Type the user's first name.
Last Name: Type the user's last name.
Email: Type the user's email address.
Login: Type a login name. This is the name you will use when you log in to Lyris HQ.
Notify User ?: If you select this option, an email is immediately sent to the user notifying them that they have an account and asking them to set their password.
To add a Web site
IMPORTANT If you are adding a Web site that uses the Content Management feature, contact Customer Support after you have finished creating the organization so they can perform necessary setup tasks.
1. In the Web Site section, type the name of the domain in the first Name field.
2. If you have additional sub-domains on your site, type them in the available boxes under Name.

NOTE Four domains fields are available during the organization setup, and you can add more domains at any time by accessing your organization settings.
3. To choose the scripting engine for the Web site, click the Scripting Engine drop-down list, and then choose one of the languages in the list. Setting this field can help Web Analytics determine how visitor sessions are determined on your Web site.
NOTE If you are not sure which script to select:

4. In the Aliases for index.html box, add any additional aliases you wish to use for index.html.

When you are finished with the options on the page, click the Save button. The Organization Details page is displayed; on this page you can see the settings you chose.
Learn How to Set Up Web Analytics for the Organization